How to Clear All Pages in Good Notes?
Good Notes is a powerful note-taking app that allows users to manage and organize their notes efficiently. Whether you need to clear out a notebook, start fresh, or remove content from multiple pages, Good Notes provides several ways to manage your pages effectively.
This guide will walk you through the process of clearing all pages from a Good Notes notebook and address some common questions related to this task.
Also Read: How to Make Your Writing Neater in Good Notes?
How to Clear All Pages in Good Notes? Step by Step Guide
1. Clearing All Pages in a Notebook
1.1 Using the Delete Notebook Option
If you want to remove all pages from a notebook entirely:
- Open GoodNotes:
Launch the GoodNotes app on your device.
- Access Your Notebooks:
Tap on the notebook you wish to clear to open it.
- Delete the Notebook:
- On iPad:
Tap the ‘thumbnails’ icon (usually found in the upper-left corner) to view all pages. Then, tap on the ‘Notebooks’ tab to return to the main library view. Swipe left on the notebook you want to delete and select ‘Delete.’
- On iPhone:
Tap the ‘Library’ tab at the bottom of the screen. Locate the notebook, swipe left, and select ‘Delete.’
1.2 Creating a New Notebook
Alternatively, you can create a new notebook if you prefer to keep the old one but need a fresh start:
- Open GoodNotes:
Launch the app and go to your library.
- Create a New Notebook:
Tap the ‘+’ button and select ‘Notebook’ to create a new one. Choose your desired template and title it accordingly.
2. Clearing Content from Multiple Pages
If you want to clear content from multiple pages without deleting the entire notebook:
2.1 Use the Lasso Tool to Select and Delete Content
- Open GoodNotes:
Launch the app and navigate to the notebook you want to edit.
- Select the Lasso Tool:
Tap on the lasso icon in the toolbar.
- Draw Around Content:
Use the lasso tool to circle the content you want to remove.
- Delete Selected Content:
Once selected, tap ‘Delete’ in the context menu that appears.
2.2 Erase Content Manually
For removing content from each page individually:
- Access the Eraser Tool:
Tap the eraser icon in the toolbar.
- Choose Eraser Size:
Select the appropriate size for the eraser.
- Erase Content:
Swipe over the content you wish to remove on each page.
2.3 Use Page Management Features
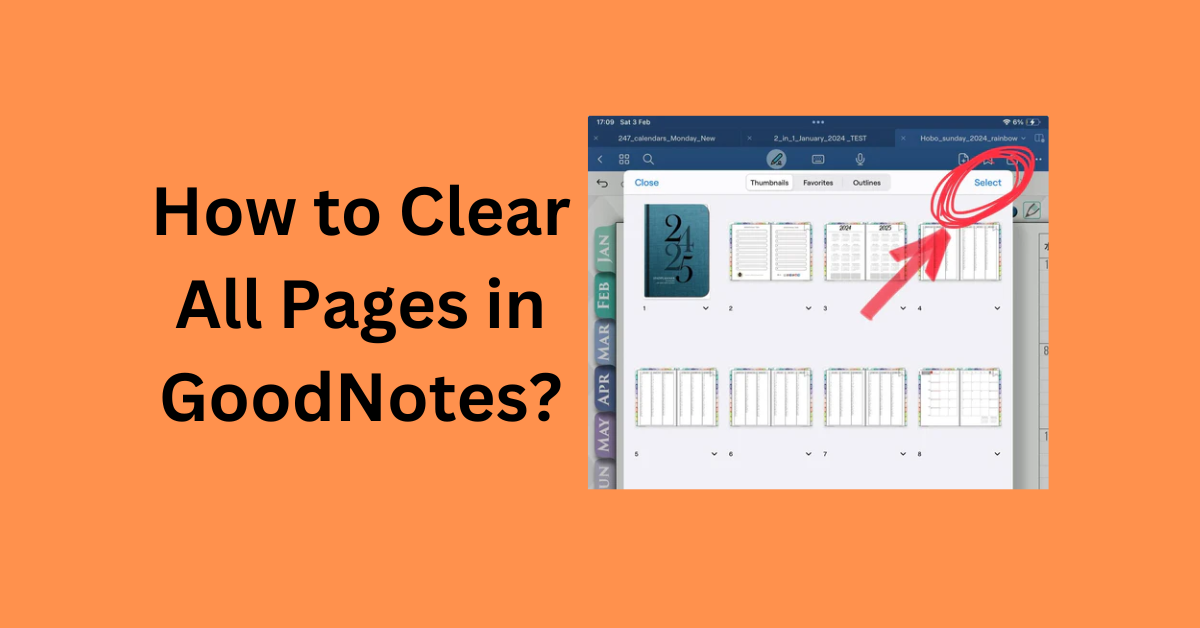
- Navigate to Thumbnails:
Tap the ‘thumbnails’ icon to view all pages.
- Select Pages:
Tap ‘Select’ and choose the pages you want to clear.
- Delete Pages:
Tap the trash can icon to delete the selected pages.
3. Export and Archive Before Deleting
If you need to keep a backup of your notes:
- Export Your Notes:
Tap the share icon (usually a square with an arrow pointing up) and select ‘Export.’ Choose the format (PDF, image, etc.) and save or share the file.
- Archive Your Notes:
Store the exported file in a cloud service or your device for future reference before deleting.
4. Reorganize and Maintain Your Notebooks
4.1 Use Folders for Organization
To keep your notebooks organized:
- Create Folders: Tap the ‘+’ button and select ‘Folder’ to create a new folder in your library. You can move notebooks into these folders to keep your library tidy.
4.2 Regular Maintenance
Regularly review and manage your notebooks to avoid clutter and ensure you only keep relevant and updated content.
Conclusion
Clearing all pages in Good Notes can be accomplished in several ways, depending on whether you want to delete an entire notebook or just clear content from multiple pages.
By using the delete function, lasso tool, eraser tool, or page management features, you can efficiently manage and organize your notes. Regular maintenance and archiving can also help keep your digital workspace clean and organized.