
How to Back Up Your Notes in Good Notes?
In today’s digital age, preserving your notes is crucial. Good Notes, a popular note-taking app, offers various backup options to ensure your notes are safe and accessible.
it’s essential to have a backup strategy to protect your valuable notes. Whether using Good Notes on an iPad or another device, follow these straightforward steps and learn How to Back Up Your Notes in Good Notes?
Also Read: How to Make a Table in Good Notes?
Why Backing Up Your Notes is Important
Before diving into the how-tos, it’s important to understand why backing up your notes is essential:
- Data Loss Prevention: Electronic devices can fail, be lost, or stolen. A backup ensures you can recover your notes in such events.
- Access Across Devices: A backup allows you to access your notes on multiple devices, ensuring continuity and convenience.
- Peace of Mind: Knowing your notes are safely backed up gives you peace of mind, allowing you to focus on your work without worrying about data loss.
How to Back Up Your Notes in Good Notes? Step-by-Step Guide
GoodNotes offers several methods to back up your notes. Here, we’ll explore each process in detail.
1. iCloud Backup
iCloud is a seamless way to back up your notes if you’re an Apple user. Follow these steps to enable iCloud backup in GoodNotes:
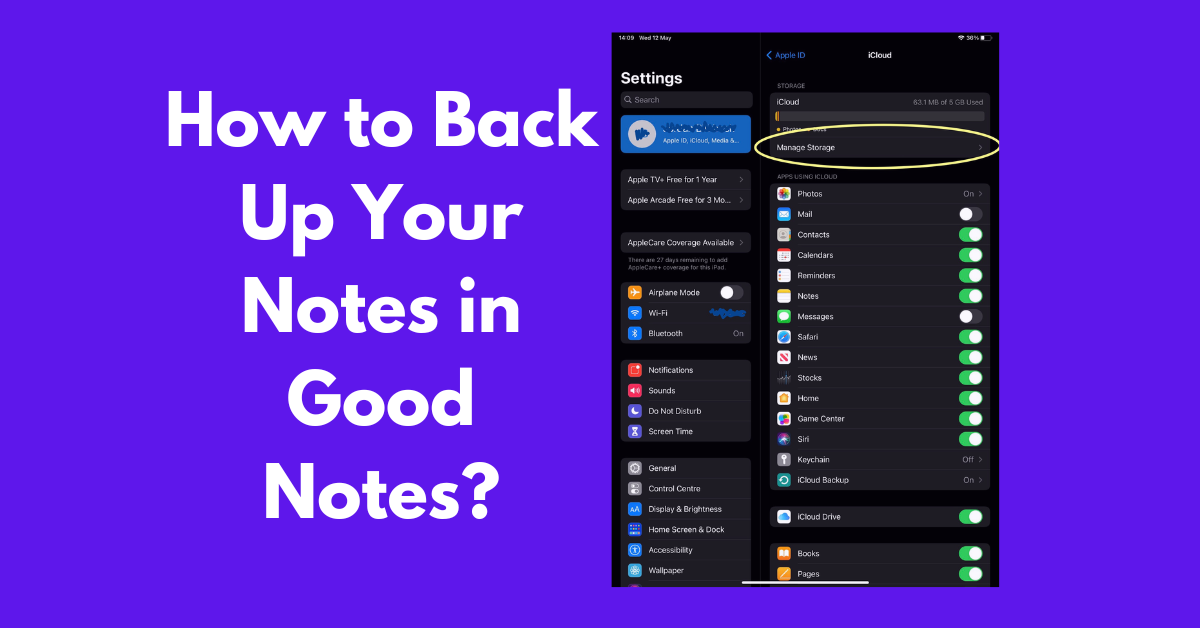
- Enable iCloud Drive: Ensure iCloud Drive is enabled on your device. Go to Settings > [Your Name] > iCloud and toggle on iCloud Drive.
- Enable GoodNotes in iCloud Drive: Scroll down in the iCloud settings and ensure GoodNotes is toggled on.
- Automatic Backup: Open GoodNotes, go to Settings > General, and toggle on iCloud under Document Storage.
2. OneDrive, Google Drive, Dropbox Backup
GoodNotes also supports backups to other cloud storage services like OneDrive, Google Drive, and Dropbox. Here’s how to set it up:
- Open GoodNotes: Launch the GoodNotes app on your device.
- Navigate to Settings: Tap on the gear icon to open settings.
- Backup to Cloud Storage: Tap on Automatic Backup.
- Select Cloud Service: Choose your preferred cloud storage service (OneDrive, Google Drive, or Dropbox) and log in.
- Choose Folder: Select the folder where you want to save your backups.
- Start Backup: Enable automatic backup and choose the types of files you want to back up.
3. Manual Backup
Manual backups give you control over when and where your notes are saved. This method is useful for periodic backups or specific note files.
- Open GoodNotes: Launch the GoodNotes app.
- Select Notebook: Tap and hold the notebook you wish to back up.
- Export: Choose Export All.
- Select Format: Choose the preferred format (GoodNotes, PDF, etc.).
- Save to Location: Select the destination (local storage or cloud storage) and save the file.
4. Back Up via iTunes
For a more traditional approach, you can use iTunes to back up your GoodNotes data.
- Connect Your Device: Use a USB cable to connect your device to your computer.
- Open iTunes: Launch iTunes on your computer.
- Select Device: Click on your device icon.
- File Sharing: Go to the File Sharing section.
- Select GoodNotes: Choose GoodNotes from the list of apps.
- Save Files: Select the notes you want to back up and save them to your computer.
Conclusion
Backing up your notes in GoodNotes is a straightforward process that provides immense peace of mind. By following the methods and best practices outlined in this guide, you can ensure your notes are safe, secure, and easily accessible whenever you need them. Don’t wait until it’s too late—start backing up your notes today!


![[GoodNotes] Copy Or Move Pages From One Document To Another](https://goodnotesguide.com/wp-content/uploads/2024/03/Copy-Or-Move-Pages-From-One-3-768x402.webp)
